In this article we would take you, to a step by step guide on how to use Google Authenticator.
Google Authenticator is an application that allows us to run two-step verification services using the Time-based One-time Password Algorithm and HMAC-based One-time Password Algorithm on our phones and tablets, which gives us higher security when we log in to our accounts online. It is also used in order to carry out cash-out tasks like withdrawals, purchases, and orders.
Due to the difficulty of the authentication process, two-factor authentication brings an extra layer of security.
Google Authenticator uses HOTP and TOTP algorithms to create one-time passwords.
The server and client in HOTP (HMAC-based One-time Password) share a counter and secret information that is used to generate unique one-time passwords on each side independently. The counters are both increased when a password is created and used, enabling the server and client to remain in sync.
With one significant exception, HOTP and TOTP both use the same algorithm. The current time is substituted for the TOTP counter.
Usually, a website that requires verification will send you a code via email or phone number, but with Google Authenticator, there’s no need to. This 30-second OTP code has six digits, and as soon as the current code expires, the app will update itself and offer a fresh one. It also allows you to access your account even if you’re not online on your phone. It also removes the need for you to share your phone number with the website you’re trying to log or sign in to.
Users must provide two distinct authentication factors as part of the two-factor authentication (2FA) security procedure, also known as two-step verification or dual-factor authentication. Social medias usually have this setting found on [Security] which would be located in their [Settings] page then after going to [two-factor authentication] they would usually provide you with two options which is getting codes via text message or an app and this time we are going to choose the app option and use Google Authenticator.
The use of 2FA improves the security of both user credentials and the assets that users can access. Single-factor authentication (SFA), where the user provides only one factor, typically a password or passcode, offers a lower level of security than two-factor authentication. The first factor in two-factor authentication methods is a user-provided password. The second factor is typically otherwise a security token or a biometric factor, like a fingerprint or facial scan.
Google Authenticator is regarded as a secure app because it was created using cutting-edge technology from Google. There are some things, though, that you should be aware of.
There isn’t a secure password required to access Google Authenticator. All of your password-required apps, including your exchange app, are therefore very likely to be stolen if your phone is stolen. Thus, avoid placing yourself in that situation.
So, without any further ado let’s hop into the following steps on how to use the Google Authenticator App.
Step 1

So first up, you have to download the app on your smartphone or tablet using this link.
Step 2
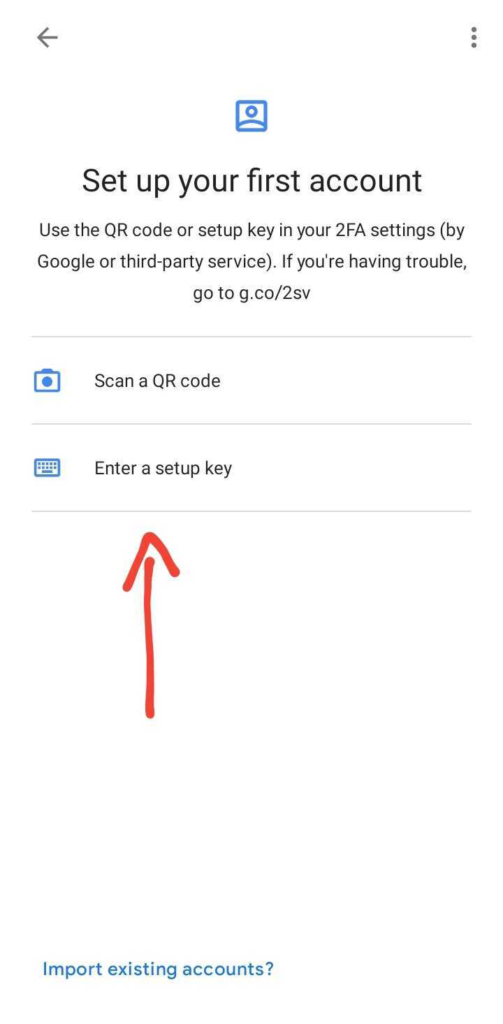
Click the Google Authenticator app you just downloaded and click on [Enter a setup key].
Step 3
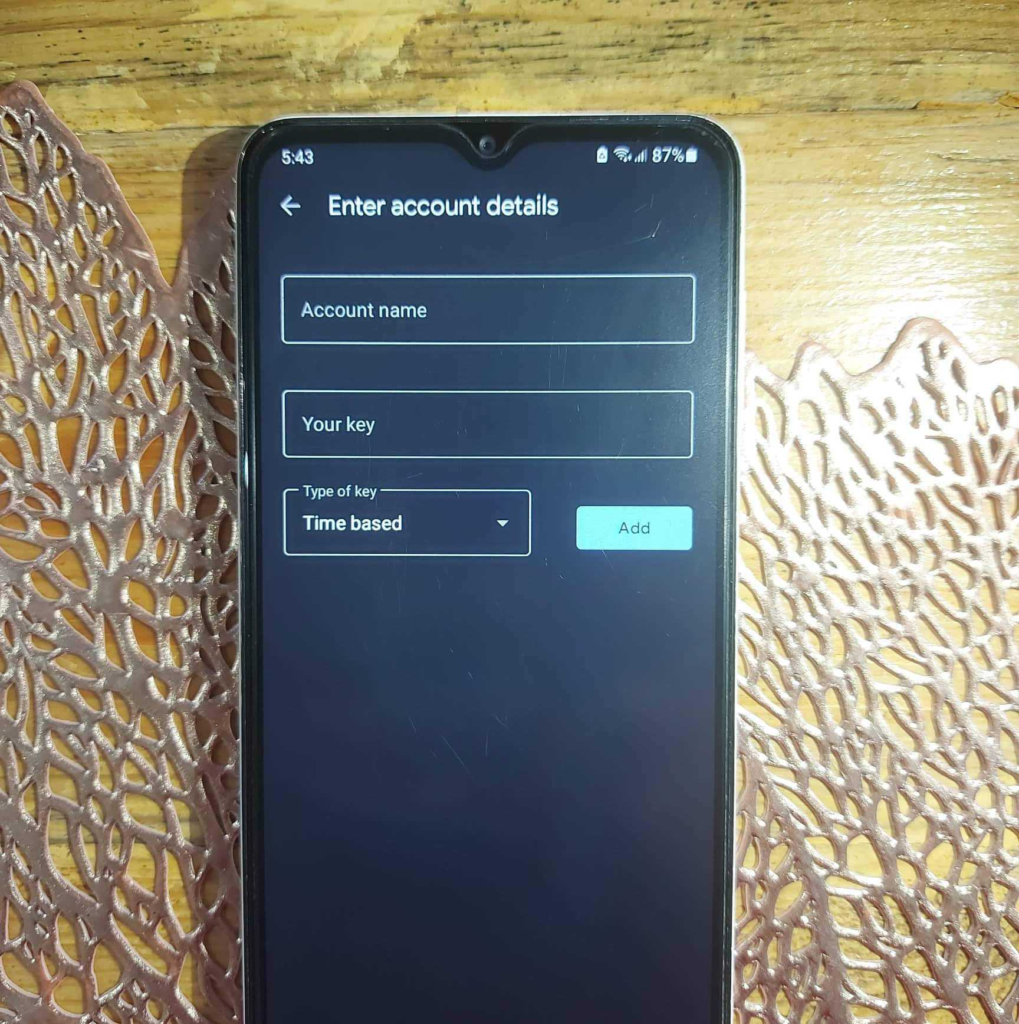
The app requires you to enter the following info. You can also choose the type of key you want. There are two options: one is [Time Based] and the other is [Counter Based], though I suggest you use the first option, which is [Time Based].
Step 4
Then click [Add]. Then after that, you will be sent to another page where you will see all your accounts set up. Then click on [Add Account].
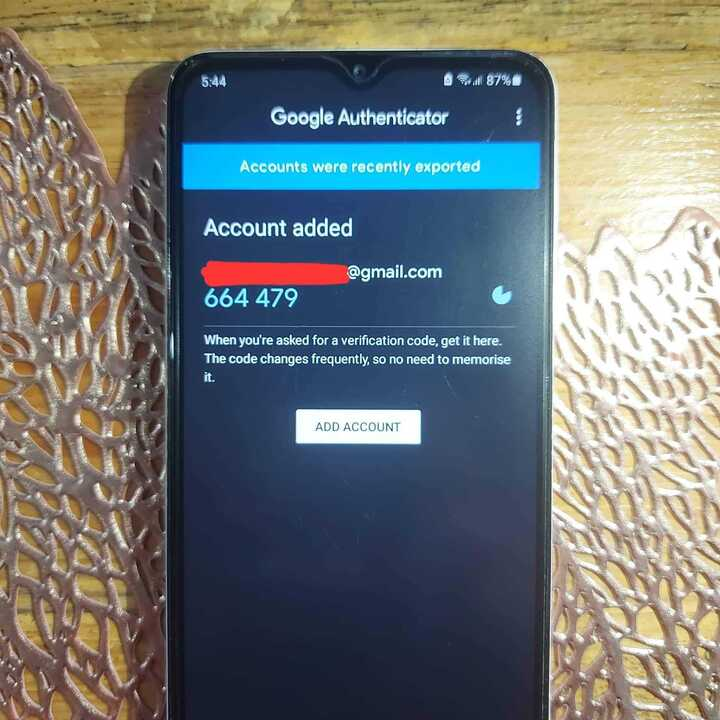
Step 5
Congratulations! You have successfully set up your first account!
Alternatively you could choose the option [Scan a QR code].
Note: Not all websites provide QR codes. That’s why we always have the [Enter a setup key] option.
Step 1
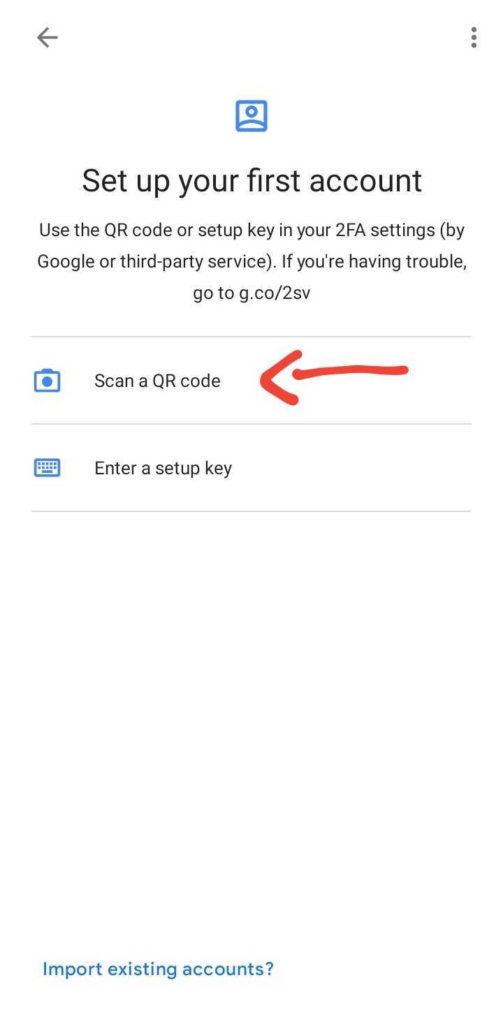
First, click [Scan a QR code].
Step 2
Simply scan the QR code shown the website has provided you on your computer or laptop screen using your smartphone or tablet after you went to their [two-factor authentication] setting and clicked on add an app.
Step 3
You will be directed to the main page and simply click on [Add Account], and you successfully added your account!

If you want to add a new account, simply go to [+] found on the bottom right corner of the main page and select [Enter a setup key] or [two-factor authentication].


