What is the Polkadot (DOT) and how does it work?

0

Delivering a decentralized web3 blockchain and placing its native DOT token among the top five digital assets by market capitalization, Polkadot has completely taken over the cryptocurrency industry.

The innovative architecture of Polkadot offers a remedy for the scalability problems that have plagued previous blockchains, causing crowded networks and excessive transaction costs.

Polkadot (DOT) has caught your attention, but you’re not sure what it is or where to start. Not to worry. This manual is intended to provide you with all the information you want on the project and to prepare you for the easiest trading environment currently accessible.

What is Polka Dot (DOT)?

A compatible and purpose-built blockchain may be created using Substrate, a framework that enables the production of bespoke or pre-built blockchains, to create Polkadot, a scalable, secure, and decentralized multi-chain network for the next web.

Polkadot offers an interoperability protocol that employs segments, or shards, to extend the network in order to create a truly decentralized web where users are in charge. It can link independent blockchains, public networks, and oracles to enable a new type of web where information and transactions can be exchanged without any intermediaries.

The Polkadot network’s native token currency is called DOT, and its tiniest unit is referred to as a Planck. Tokens are locked up as part of linking new chains to the Polkadot network or playing another function in the ecosystem. It supports payments, network governance, staking, reward incentives, transaction fees, and other bonding procedures.

DOT’s supply is unrestricted, unlike the majority of other cryptocurrencies. This is intended to stimulate the network and dynamically change in accordance with user staking participation rates, increasing by up to 10% annually.

Polkadot: How Does It Operate?

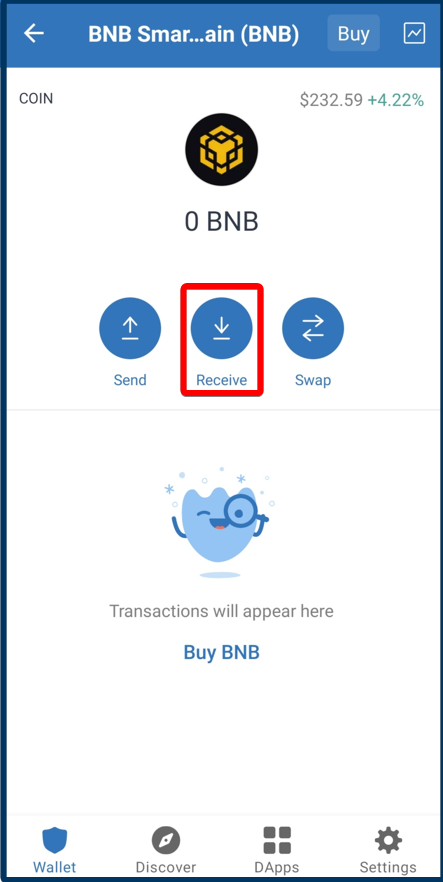
Polkadot uses a method of public and private key encryption to enable the transfer of money from one digital wallet to another. Your recipient address is the hash of your public key, and your private key serves as a password for approving and broadcasting transactions over the network. These pending transactions are confirmed in a block of transactions every six seconds or so, and the blocks collectively make up the Polkadot blockchain.

Of course, Polkadot provides much more than just the ability to send and receive money. Polkadot is a sharded multi-chain network that may process data and transactions on many chains simultaneously, or “parachains,” under the control of a central relay chain. Due to its sharded architecture, the network is divided into several sections, or shards. Because transactions may now be handled concurrently on each shard rather than sequentially over the whole network as they were in earlier blockchain generations, throughput has increased.

Therefore, many Parachains may connect to Polkadot, benefiting from the network’s overall security while greatly enhancing scalability, interoperability, and cross-chain capability and removing the congestion, excessive fees, and incompatibility of older blockchains. With the aid of a governance structure run by owners of the DOT native token, Polkadot maintains improvements automatically without the need for hard forks.

Instead of the mining reward incentives given in Proof-of-Work blockchains like Bitcoin, Polkadot employs a Nominated Proof-of-Stake (NPoS) consensus mechanism, paying users for locking up DOT tokens in a process known as staking.

Holders of DOT tokens can stake tokens to participate as Nominators, choosing to support up to 16 Validators as trusted candidates with their stake. Collators on Polkadot maintain Parachain nodes, Fishermen nodes keep the network safe, and Stakers interested in maintaining the entire network can run a Validator node. Then, validators create new blocks, check Parachain blocks, and ensure finality. Later on, we’ll go into further depth about these duties.

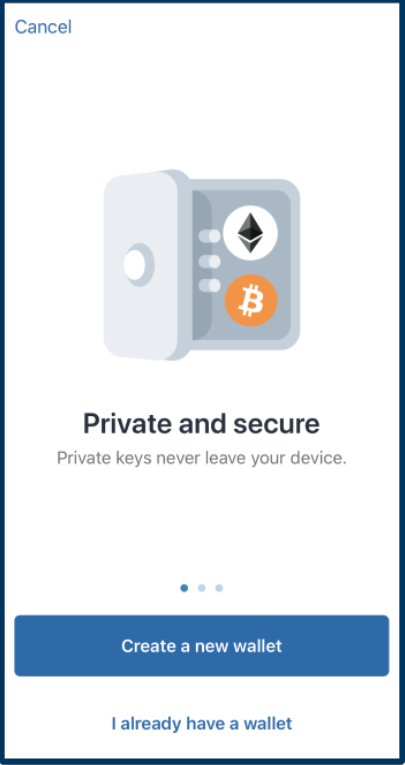
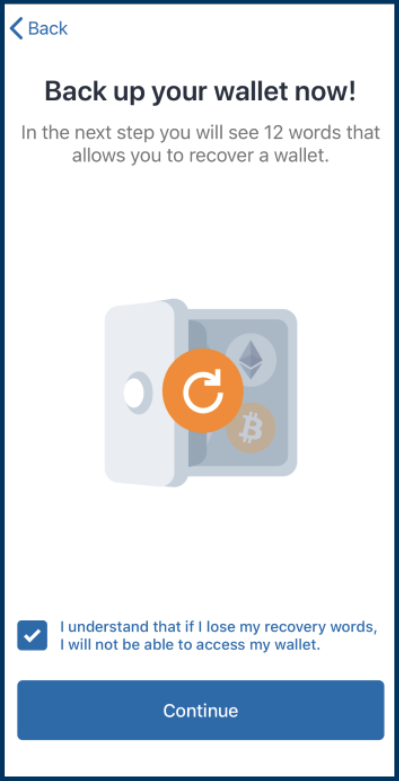
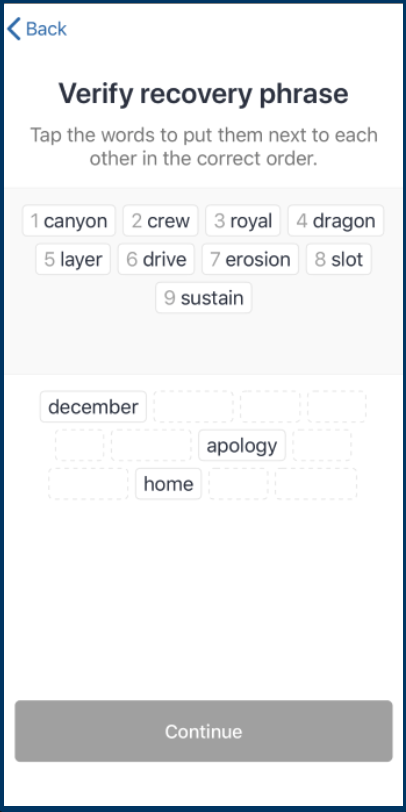
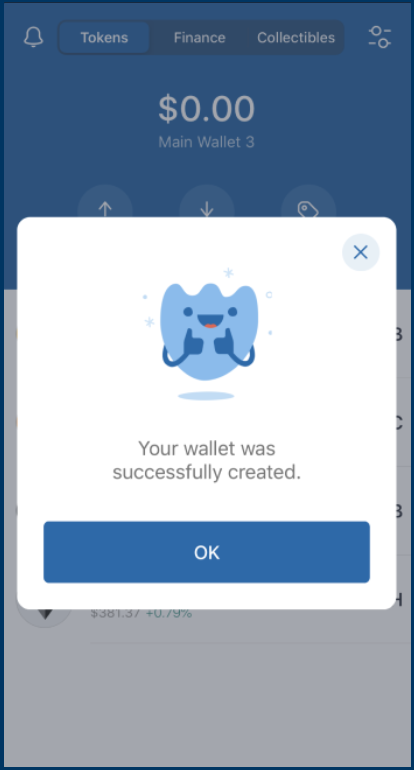
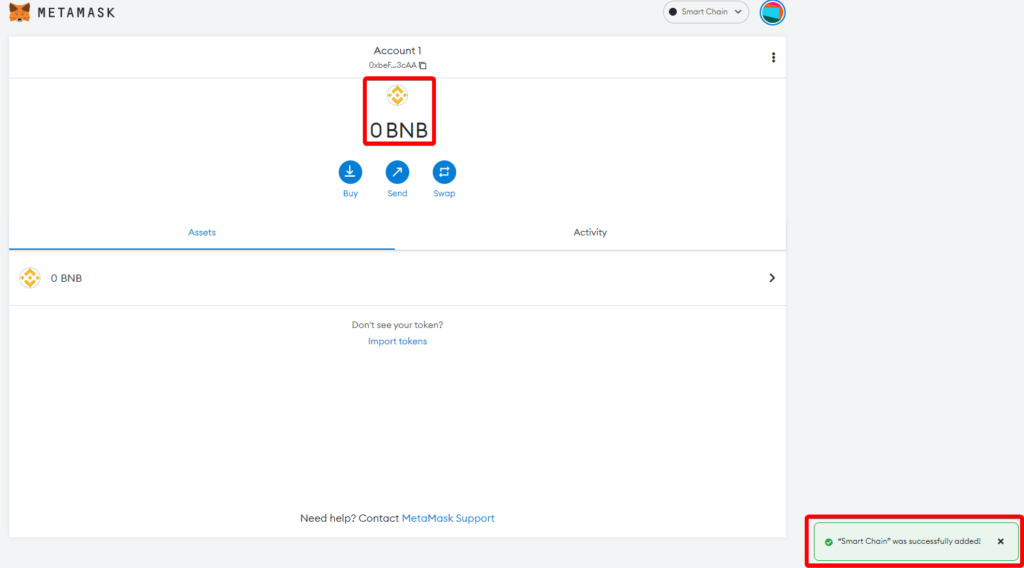
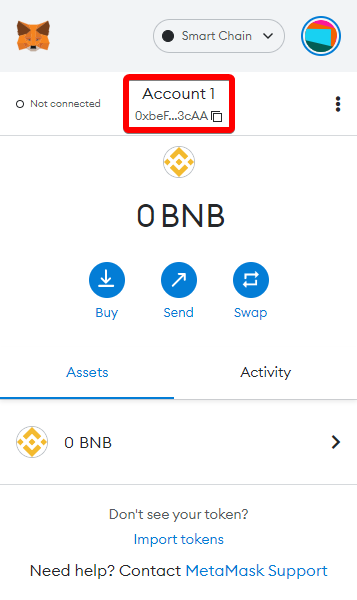
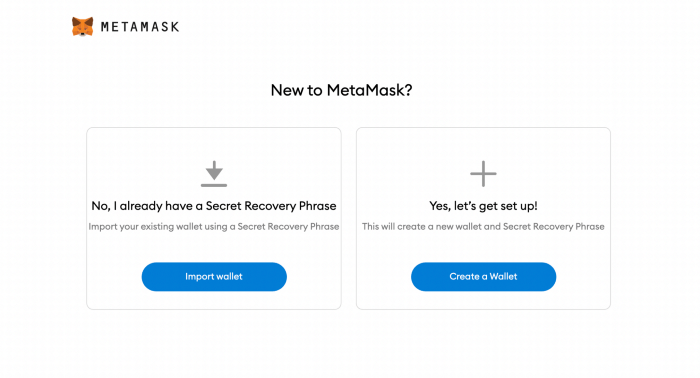
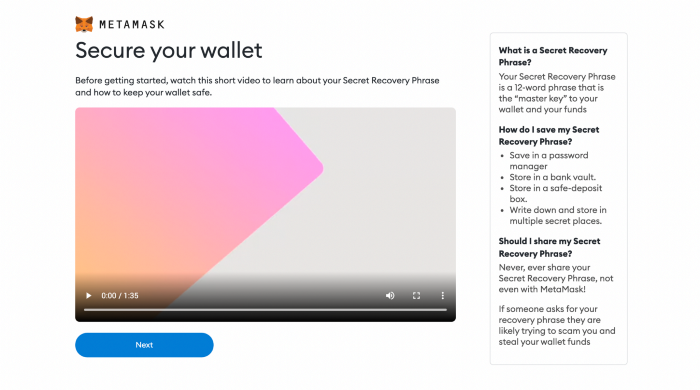
There are two very significant details about a polka-dot wallet that you must be aware of:

A string of numbers and letters used to transfer funds to the Polkadot wallet. Through the wallet address you specify, others can send money to you. The format of a Polkadot (DOT) wallet address is 16FuasKqTX5WLaLsWCnrXC4i3KWm717k2bBHJgK3fw4ZY5qn.

An encryption key that may be used as a password and contains any 12 English words. You must complete the Passphrase login stage if you want to carry out the wallet recovery process. Password format: full yearly slow album wisdom snow slice refuse pony flower middle beneath.

Consider the Polkadot wallet as a bank account, with the address on the wallet serving as the account number and the passphrase serving as the password.

With a bank account, however, other individuals will be aware of your personal information. Regarding the Polkadot wallet, transactions only take place through the address, which is encoded into a string of numbers and characters, and the user becomes anonymous; nobody knows who owns the wallet.

What Sets Polkadot Apart?

Among the top blockchain systems, Polkadot is exceptional in that it offers sharding for scaling, the pooled security of a central relay chain and adaptive consensus, as well as the interoperability of a multi-chain network. Throughput is substantially increased by the parallel processing made possible by performing transactions in different shards, and cross-chain capabilities allows transfers of any kind of data or asset across shards.

Polkadot also reduces the need for projects to select between several separate blockchain networks by offering interoperability with already-existing platforms like Ethereum, with clearly defined community governance, and automated updates.

Due to Polkadot’s use of the Substrate blockchain technology, other projects utilizing Substrate may rapidly and easily develop bespoke chains that operate natively on Polkadot. This implies that you may use the framework to begin developing a blockchain before you are ready to release it to the network.

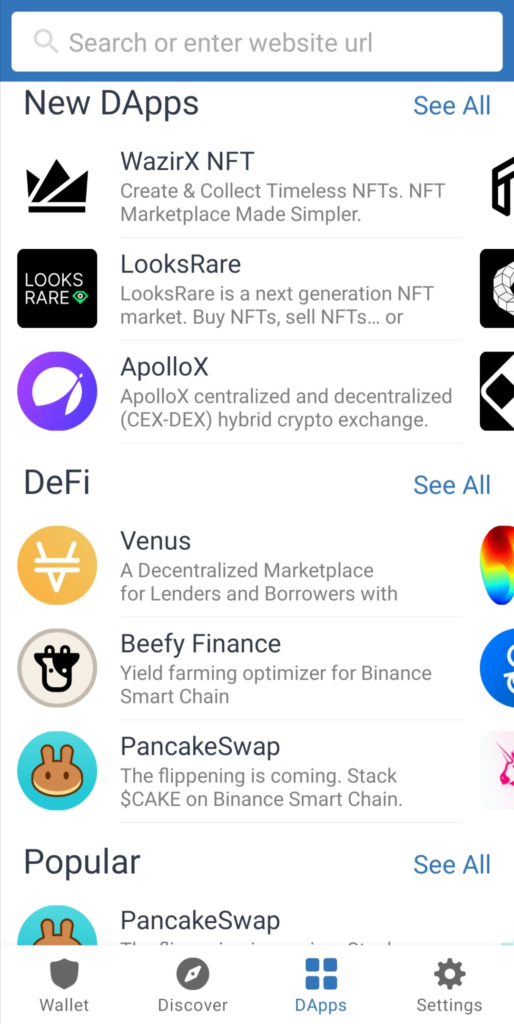
The promise of Polkadot really resides in enhancing current blockchains rather than competing with them, despite the “Ethereum killer” moniker that it occasionally receives. Over 350 projects in its ecosystem that are developing smart contracts, decentralized finance (defi), oracles, digital collectibles (NFTs), gaming, and other solutions, most notably Chainlink and 0x Protocol, have already acknowledged this.

Polkadot is not a platform for smart contracts by itself. As a result, major protocols have seen the highest rise in active developers. Instead, it provides the framework for decentralized app (dApp) developers to incorporate smart contracts across an interoperable network with wide-ranging functionality.

What Adds Value to Polka Dots?

With over $20 billion in staked value, Polkadot is presently one of the top staking platforms, delivering projected payouts of over 13% annually. The market capitalization is approximately $30 billion, and more than half of the qualifying tokens are held.

By staking DOT, customers may, in addition to any financial gains, counteract the rate of inflation compared to simply holding and get an annual return on their investment. In proportion to the amount of DOT they are staking, DOT also gives participants the option to vote on network enhancements and future feature sets.

Many projects have already been attracted to Polkadot because of its scalability, interoperability, and cross-chain functionality, including Acala’s cross-chain defi hub and stablecoin platform, Moonbeam’s smart contract Parachain that enables developers to use existing Ethereum dApps on Polkadot, Chainlink’s oracle technology, and Polkastarter’s decentralized exchange platform. As a result, the network and the DOT tokens needed to create, secure, or use Polkadot Parachains gain value and utility over time.

How Secure Is the Polkadot Network?

In order to optimize chain security, Polkadot’s consensus process, NPoS (Nominated Proof-of-Stake), was created with the responsibilities of Validators, Collators, Fishermen, and Nominators.

By staking DOT to operate validating nodes and carry out a thorough examination of the Relay Chain, validators protect the network. Additionally, they verify Parachains and engage in consensus with other Validators to determine the real shared state of the network, rejecting any fraudulent transactions in the process. In exchange for getting incentives, they contribute new blocks to the Relay Chain, which indirectly benefits all Parachains by participating in its security.

Regardless of stake, the Polkadot network distributes validation incentives to all Validators equally. In order to encourage a more evenly-staked collection of Validators, staking benefits are then given pro-rata to all stakers following the deduction of the Validator payment.

For the Relay Chain and their specific Parachain, collators save a full node history. Collators combine Parachain transactions to create fresh Parachain block candidates that Validators may verify in the Polkadot network’s shared state. After a block candidate has been approved by the Relay Chain Validators, a Collator cannot proceed with adding blocks to a Parachain.

Additionally essential to XCMP cross-chain transmission are collators. They are all aware of one another as peers since they are all complete nodes of the relay chain. They can use this to communicate from Parachain A to Parachain B.

Fishermen and Collators are both complete nodes of Parachains, but they take on separate policing responsibilities. Fishermen watch for incorrect transactions in the Collator process and report them to Validators. If a report turns out to be accurate, they are paid; however, if they are incorrect, they run the danger of losing their needed role stake in the relay chain.

And at last, Nominators are active DOT token owners who contribute to protect the Relay Chain by staking DOT and choosing qualified Validators in exchange for a portion of the staking benefits but do not wish to bear the expense and burden of other positions in the network. This encourages greater network security involvement and cautious Validator selection because if Validators act inappropriately (such as going offline, attacking the network, or running changed software), both Validators and Nominators will lose a portion of their staked DOT.

How Can Polka Dot Be Used?

For many organizations and people, Polkadot provides a variety of uses. It makes it possible to use a different, decentralized payment mechanism free from the meddling of middlemen, giving you more control over your money.

As an alternative to costly and drawn-out foreign transfers, DOT may also be used for speculation and investing. For the hundreds of millions of individuals who have access to cellphones but no bank accounts, it can also help create an alternative financial system. We are also presenting a new potential for income production or augmentation through DOT staking.

The use cases for projects working on defi, oracles, digital collectibles, gaming, IoT, privacy, gaming, cross-chain solutions, and more are expanded by Polkadot’s interoperable, scalable, secure, and decentralized platform, which eliminates the bottlenecks and high transaction fees of legacy blockchains.

How Should I Pick My Polka Dot Wallet?

Your choice of DOT wallet will probably be influenced by the purpose for which you’ll use it and the quantity of items you need to keep.

The most secure solution comes from hardware wallets, also known as cold wallets, which offer offline backup and storage. DOT currently only supports Ledger hardware wallets in combination with the official Polkadot-JS online wallet. However, hardware wallets come at a higher cost and with a little bit more of a learning curve. As a result, they could be more suited to holding more DOT for more seasoned users.

Another choice that is cost-free and simple to use is software wallets. Both custodial and non-custodial versions are available for download as desktop or smartphone apps. The service provider manages and backs up the private keys for you while using a custodial wallet. The private keys are kept in non-custodial wallets using secure components on your device. They may be more suitable for individuals with less experience or lower quantities of DOT, despite the fact that they are more handy than hardware wallets.

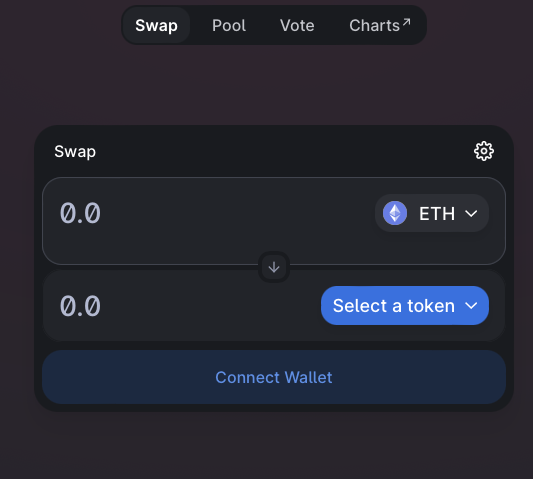
Additionally free and simple to use, online wallets or web wallets may be accessed from a variety of devices by utilizing a web browser. However, they are regarded as “hot wallets” and could not be as secure as hardware or software alternatives. You should pick a trusted company with a solid reputation that has experience in security and custody because you are probably entrusting the platform to handle your DOT. They are therefore best suited for modest holdings or for seasoned frequent dealers.

The Polkadot-JS official online wallet lets you transfer, receive, and store DOT and Polkadot ecosystem currencies as well as take part in staking and voting from inside your web browser. But certainly more experienced users would benefit from it.

A Beginner’s Guide to Trust Wallet

0

A number of cryptocurrencies and NFTs can be safely stored in Trust Wallet.

A free, non-custodial mobile wallet called Trust Wallet is available for storing cryptocurrencies and non-fungible tokens (NFT). Because it has a direct internet connection, it is referred to as a hot wallet. Only iOS and Android smartphones may use the software, which is very easy to set up and use.

Binance purchased Trust Wallet in 2018 to use as its official decentralized wallet. It supports over 65 blockchains and can hold more than 4.5 million digital assets. It has been downloaded more than 30 million times to far, making it a well-liked wallet among investors and traders.

Despite being compatible with many other blockchains, Binance’s Trust Wallet stands out from other well-known wallets thanks to its compatibility with almost all platforms built on Binance Smart Chain (BEP-20), including PancakeSwap.

To store your cryptocurrencies, such as Bitcoin, Ethereum, or other altcoins, you will always require a crypto wallet. However, getting a new wallet up and running may be difficult and time-consuming.

You will learn the fundamentals of using Trust Wallet, one of the most well-liked cryptocurrency wallets out there, in this article.

How is Trust Wallet put to use?

Trust wallet is a cryptocurrency wallet that enables the storage, transferring, and receiving of digital assets. It is made to be straightforward and simple to use, yet it also offers security and peace of mind.

Each user’s private key, which is required to access their account, is created as part of the trust wallet’s operation. The whole user’s data is encrypted and saved locally on their smartphone. For additional protection, Trust wallet also provides fingerprint and face recognition.

What functions does Trust Wallet offer?

Swap: It’s simple to trade one cryptocurrency for another.
Purchase: You may purchase cryptocurrency with your credit card on third-party websites like Simplex or MoonPay.
Stake: By using the Trust Wallet’s staking feature or by using a selection of decentralized applications, you may earn interest (dapps).
Store: A variety of blockchain networks are available for storing your cryptocurrency.
Collect: You may collect NFTs by visiting well-known NFT markets like OpenSea or Rarible using the dapp browser in your Trust Wallet.

Starting a Trust Wallet account and how to do it

There are a few easy steps to follow after downloading the app to get started.

To accept the conditions, select “Create a new wallet” and click “Continue.” Prepare a pen and paper because Trust Wallet is telling you the truth when it says that you risk losing access to your wallet and any cryptocurrency it contains if you forget your recovery words, also known as a seed phrase or recovery phrase.

You will be prompted to write down your recovery phrase on a new screen that will display. You must manually record it and maintain it in a secure, confidential location. It is not advised to save the words in digital form since it is less secure.

For Trust Wallet, the recovery phase consists of 12 words. These phrases will be used in the event that you misplace your wallet, and they are the only method to get it back. So let us reiterate: Keep them in a secure, private location.

Trust Wallet will ask you to put your recovery phrases down in the exact same sequence that you got them so that you can confirm that you properly backed them up.

A screen indicating “Your wallet was successfully generated” will appear.

Adding money to your Trust Wallet

purchasing tokens using Trust Wallet

You should put some cryptocurrency in your wallet now that you have one. Start by clicking the “Receive” icon on the main screen.

The screen where you choose the cryptocurrency you wish to receive will now be presented to you. We’ll utilize BNB Smart Chain as our example.

As seen in the screenshot below (in the blue box), after clicking the “Buy” button, you may enter the amount you wish to spend in US dollars and select a payment processor like MoonPay (shown in the red box).

Token transfer to trust wallet

You may also transfer tokens to your wallet if you decided not to purchase any at this time. The procedure is comparable to purchasing tokens. So, navigate to the home screen and click the “Receive” option.

You will then be presented with a menu of cryptocurrencies where you may choose the coin you want to receive. We’ll once more utilize BNB Smart Chain for our illustration.

To transfer your tokens to that address, hit the “Receive” button in the centre of the screen, as seen in the picture below.

Utilizing Trust Wallet and decentralized applications

As soon as your wallet account is created, you will see a range of buttons with various functionality available to you, such as having access to dapps to carry out different transactions, as seen in the picture below.

Trust Wallet is a Swiss Army knife-style solution for decentralized money thanks to these features (DeFi). One thing you cannot do on Trust Wallet, unlike on exchanges like Binance or Coinbase, is convert your crypto assets into fiat money.

The capability for DeFi and NFTs in Trust Wallet’s settings will please more experienced users while still being user-friendly for beginners.
Trust Wallet is a desirable alternative for people who seek an all-in-one solution for managing their portfolio in the palm of their hands since it allows you to store a variety of cryptocurrencies.

How to Use WalletConnect?

0

The fourth quarter of 2021 saw a startling 902% growth in new installs for the top 20 cryptocurrency applications, highlighting the rising popularity of these programs. In order to access and utilize the capabilities of these decentralized apps (DApps), users must have appropriate blockchain wallets. Adding several crypto wallets to every application is challenging. WalletConnect serves as a bridge to swiftly connect different DApps to blockchain wallets as a consequence.

WalletConnect is a helpful tool for connecting with DApps when users are unable to use PCs or laptops while on the road. Over time, it may maintain top-notch security while minimizing time and effort.

How Does WalletConnect Work?

An open-source protocol called WalletConnect aids in establishing connections between different crypto wallets and DApps. The protocol creates a distant, secure connection between the apps and wallets. It creates a symmetrically encrypted connection using a shared key between two peers. WalletConnect, to put it simply, creates a bridge that joins any mobile wallet with any decentralized online service.

Users may use WalletConnect to link more than 450 DApps, like Uniswap and Aave, with more than 170 wallets that are WalletConnect-compatible, including MetaMask and Trust Wallet. When one peer scans the QR code (or deep link) with a standard WalletConnect URI, a connection between DApps and wallets is formed when the counterparty accepts such a connection request. WalletConnect makes it simpler to establish a trustworthy and secure connection when it is integrated into a specific DApp. Compared to installing MetaMask or any other cryptocurrency wallet, this is significantly safer.

WalletConnect is a new blockchain-based solution that allows consumers to have full control over their personal information and finances. The WalletConnect platform uses the Ethereum blockchain and is powered by the wallet.com API.

It’s more than just a wallet. It’s your wallet, so you can design it how you want it to be.

The platform was designed with security in mind, and users will be able to verify their identity with biometric data or a password before making any transactions.

They’ll also be able to enjoy all of the perks of having an account like:

-Being able to use your credit or debit card (or both) on the WalletConnect platform

-Being able to store multiple cryptocurrencies in one place

-Having access to your cryptocurrency wallet anywhere in the world

Upgraded Features in WalletConnect 2.0

The following infrastructure enhancements are promised by WalletConnect 2.0 over its v1.0 features:

Chain Agnostic: WalletConnect 2.0 will be able to function on any blockchain that the user chooses, such as Ethereum or Cosmos.

Multi-Chain: WalletConnect 2.0 provides multi-chain integration, which means that users may link a single wallet to several chains at once in addition to supporting various chains.

Decentralized Messaging: Users will have control over who may send messages to their wallets using encrypted wallet-to-wallet communication.

Push notifications: The push notification capabilities in WalletConnect 2.0 will alert customers to incoming transactions.

How to Use WalletConnect to Connect DApps?

Connecting DApps to WalletConnect is a quick and easy procedure. Nevertheless, the procedure varies based on whether you’re using a desktop or a mobile device. Make sure the DApp you choose supports WalletConnect before you start. To use WalletConnect in your DApps, follow these four steps:

Launch a Compliant DApp
In your mobile or desktop browser, launch the mobile or web DApp that you want to connect to. Verify that the specific DApp is compatible with WalletConnect. You may test using this online example application before you begin at https://example.walletconnect.org/.

Set up Your Wallet
Since virtually all DApps on Ethereum now feature a Connect Wallet option, let’s use Uniswap as an example (or similar). Choose this alternative by using your wallet. If your DApp supports it, you’ll be able to connect via WalletConnect.

For Desktop

Choose WalletConnect, then use your wallet to scan the presented QR code.

For Mobile

If you’re using a mobile browser, you may choose your preferred wallet after choosing the WalletConnect option in your DApp. Choose your favorite wallet from the list that is provided to connect.

You can proceed to approving your DApp when this has opened your wallet.

Enable the DApp

Your chosen or preferred wallet will open up when you scan the QR code. A pop-up will appear asking you to confirm the connection to the selected wallet. The DApp can successfully access and interact with your wallet after you give permission for the connection.

Now, you may use the DApp to withdraw money or other assets (such as tokens) from your wallet up to the cap you’ve specified.

Verify the transaction

Now that you’re linked, your DApp may use WalletConnect. A pop-up requesting your consent for the transaction will show when you make a transaction inside the DApp. Click Confirm Swap after reviewing the transactional information. A pop-up window asking for your confirmation of the transaction will then display in your wallet. After verifying the information, simply click Confirm.

To provide the safest and most secure transactions possible, every user can link DApps with WalletConnect through its relay server.

How safe is WalletConnect?

In general, mobile applications are less secure than hardware wallets. Hardware wallets have clear security policies and tailored security features that make it possible for them to communicate and store user private keys more securely.

WalletConnect, on the other hand, creates a safe, secured link between your wallet and DApp. With a shared key that only these two parties have, all data sent between the wallet and DApp is symmetrically encrypted. The main key isn’t shared with the bridge server, regardless of whether you scan a QR code or utilize a deep link with a mobile wallet. In other words, the key isn’t disclosed to any other parties, including the intermediary carrying out the secured transaction.

How to Use WalletConnect to Ensure the Safest Connection

Before validating the transaction, make sure the recipient address and transaction amount are accurate. In order to prevent the WalletConnect App from changing the transaction information and transmitting a fraudulent transaction, this is necessary. DApp developers have the option of hosting their own bridge servers or intermediates to completely protect themselves against fraud.

Additionally, after completing your transaction, it’s a good idea to disconnect your wallet from the DApp. Additionally, you need to confirm that the URL you are using to access the DApp is safe and reliable.


How to pass Verification Plus level on Binance

0
www.binance.com

Binance is one of the most popular cryptocurrency exchange designed for experienced cryptocurrency investors. This article is intended for newbies who wants to start trading or investing using the Binance exchange. Before we jump to the steps, here’s a quick introduction of what Binance is.

Binance

Binance Exchange is the largest crypto exchange by trade volume and one of the fastest in the world.

Vision

Their vision is to increase the freedom of money globally. We believe that by spreading this freedom, we can significantly improve lives around the world.

Mission

Their mission is to be the infrastructure services provider for the blockchain ecosystem.

Build the future of technology

What’s the secret to Binance’s success? The answer is obvious: Our people. We are proud to have one of the most talented, hardworking and passionate teams the world has to offer. Interested in joining our team?

The following are steps in order to make an account and get a plus level.

Steps to update your Identity Verification information is also included below.

Step 1

Go to https://www.binance.com/en on your browser and click the register button found on the top right corner of your screen

Step 2

Then it would bring you to this page where you have two options:

  • To sign up with phone or email
  • To continue with Apple

But in this tutorial we are going to use email

Also, make sure you agree to their Terms and Conditions and Data Protection Guidelines

Step 3

You then have to enter your current location of residence

Then you would have two more options:

  • To create a Personal Account
  • To create an Entity Account

For Entity accounts, enter your email and password, agree to Binance’s Terms of Service and you’re good to go

For Personal Accounts you would have to do the following:

  • Enter Account Details
  • Email Verification
  • Enter Phone Number
  • Phone Verification

Now that you’re done making your account, let’s proceed to verifying your binance accounts.

But first…..

What is KYC, or Identity Verification?

KYC is an acronym for “know your customer”, or “know your client”. It refers to the verification of a customer’s identity, typically by a financial institution. Identity verification requires information that can be used to–of course–verify your identity, like a valid ID card, utility bills containing your home address, a passport, etc. ID document requirements vary from institution to insitution, and even region to region.

Customers are typically required to submit identity verification documents during account opening and at times, when there has been a change in the user’s personal information. For example, if you officially change your name a few months after creating your account, you will be required to update your personal information. 

If you do not complete the KYC process, you may not be able to access all the features on a cryptocurrency exchange. For example, Binance allows customers to create accounts, use basic functions and perform limited transactions without submitting KYC information. In order to gain full access and increase higher deposits and withdrawal limits, customers will need to complete the KYC verification process. 

Where can I get my account verified?

The Identity Verification is accessible from [User Center] – [Identification] or directly from this page. On the page, which establishes the trading limit for your Binance account, you can check your current verification level. Please finish the relevant Identity Verification level in order to increase your limit.

Please be aware that only users from certain EEA countries may use this guide. Please see How to Complete Identity Verification for information on other nations.

Step 1. 

After creating an account, new users will be forwarded to the page below. 

Press [Start Now].

You can also sign in to your Binance account and select [User Center] – [Identification].

Step 2.

Choose your country. Click [Continue] after providing your personal information.


Please check to see if all of the information entered matches what is on your ID documents. Once it has been confirmed, you cannot change it.

Step 2.1

Depending on your country, you might need to agree to the Terms and Conditions before you can continue.

Step 3

Depending on the country you chose, you will be directed to various vendors’ websites to complete the ID verification and liveliness test. There are three vendors at the moment.

After being directed to a vendor, just follow the instructions the vendor states.

Step 4

After that, you must provide proof of your address. 

When finished, click [Continue].

You might have to upload proof of your address depending on your country. You could find it on your utility or bank statement.

To submit, press [Continue]

Step 5

There are some compliance questions that you must respond to.

Step 6

Your application was sent successfully. Please be patient while Binance reviews your data. We’ll email you to let you know when your application has been approved.
Please enter your information and finish the face verification within 15 minutes. During the process, avoid refreshing your browser or application.
Up to ten times a day, you may try to finish the identity verification process. Please wait 24 hours before resubmitting your application if it has been rejected 10 times in the last 24 hours.

Once Binance approves your identity verification, that’s it, you are good to go.

To further secure your account, click on Security as shown below.

You can setup Two-Factor Authentication (2FA).

You can aslo enable some advanced security options and manage device/account activities.

How do I update the information for Identity Verification?

You can update on the [Update Identity Verification] page if one of the following circumstances applies and your identity information has changed.
To update your information, you can also get in touch with our customer service representatives via Binance Support. When the customer service response appears, type “How to update Identity Verification” and click the link that says [Click here to reset KYC].

Note:

Before clicking [Confirm Update], please read the declaration thoroughly.
You are not permitted to give someone else access to your account or use their ID in place of your own.

Here are some reasons for updating your identity verification:

  1. The paperwork is no longer valid;
  2. The document now bears a different name;
  3. The document’s ID number has been modified.
  4. The nation of origin has altered;
  5. To comply with the specifications of a particular fiat channel, update or replace your existing documents;
  6. Change the name to a system-recognized language, such as changing an ID card from the local language to an English-language passport;
  7. Documents should be updated to meet Binance Card requirements.

Step 1

Click [Identity Verification Update] to access the page. Choose the update’s motivation before carefully reading the declaration. Click [Confirm Update] after checking the [I understand and agree to the declaration] box.

Step 2

After providing the necessary details, click [Continue].

Step 3

As the system processes your update request, please be patient. You will be notified via email once it is finished.

What is Binance?

When it comes to daily cryptocurrency trading volume, Binance is the largest cryptocurrency exchange in the world. It was established in 2017 and is officially registered there. Developer Changpeng Zhao, who had previously developed high frequency trading software, founded Binance.

To learn more about Binance, visit their website

What exactly is the BNB Chain Wallet? How to Make and Use a BEP20 Wallet

0

Binance became one of the earliest and most well-known DeFi ecosystems in cryptocurrency in 2022 when it rebranded both Binance Chain (BEP2) and Binance Smart Chain (BEP20) as BNB Chain. One of the most widely used blockchains recently was Binance’s layer-1 blockchain, which competed with Ethereum.

What Exactly Are BEP-20 Tokens?

A BNB Chain token standard called BEP-20 builds on the groundwork already out by the ERC-20 standard. Tokens created in accordance with the BEP-20 and ERC-20 standards are fungible and exchangeable. Products that are fungible are ones that you are concerned about the quantity of since they are not unique. Fiat currency is a prime example: the important factor is how many dollars you have rather than which ones. Products that are non-fungible cannot be traded. You are worried about which one you have.

What is BNB Chain?

BNB Chain (Geth) was created as a result of a hard fork, or permanent divergence, of the Go Ethereum protocol. Although it and Ethereum are relatively similar, there are several significant differences.

The main difference is the alternative consensus algorithm used by BNB Chain. BNB Chain uses 21 validators, each of whom generates a block. Delegators who stake BNB, the native token of BNB Chain, support these validators. This consensus procedure is known as Proof of Staked Authority (PoSA). Depending on the amount wagered, the top 21 candidates are chosen to serve as validators.

Benefits of a BNB Chain

Because the BNB Chain chain is a fork of Geth, it is EVM-compatible. This implies that you can use the same contracts on BNB Chain that you can on Ethereum. BNB Chain, being a PoSA network, offers distinct trade-offs than Ethereum. This has various advantages for certain usage situations. Notably, BNB Chain is quick and cheap, which draws developers to the network.

Bridge Assets to the BNB Chain

How can you transfer assets from Ethereum’s main chain to the BNB Chain?

To move assets from Ethereum to BNB Chain, you must use the Binance Bridge. This is a contract that will take custody of your Ethereum assets and, after a short wait, produce a Binance counterpart of that asset.

Consider this to be similar to using tokens in an arcade. You hand over your money (ETH) to the arcade employee (bridge contract), and they produce tokens (ETH BEP-20, a BEP-20 variant of ETH) for usage within the arcade (BNB Chain). You may then utilize the tokens (ETH BEP-20) while in the arcade. If you want to quit, you can return your tokens (ETH BEP-20) to the employee (bridge contract), who will destroy or burn the tokens (ETH BEP-20). Then they’ll refund your money (ETH) for the tokens (ETH BEP-20).

What You’ll Require

To begin developing on BNB Chain, you’ll need the same tools as you would for any EVM-compatible chain. That is one of the benefits of utilizing EVM-compatible chains: they frequently support the same tools. We will be utilizing the following tools for this tutorial:

  • A web-based solidity IDE called Remix
  • Brave Wallet, a cryptocurrency wallet comparable to Metamask
  • BNB Chain Testnet—The BNB Chain testing network.
  • Gain test net BNB using the Binance Faucet.
  • A safe blockchain contract standard called OpenZeppelin

Connect to BNB Chain Testnet

Before you can start building an application on BNB Chain testnet, you’ll need to set up your wallet. A great tool for this is Chainlist, which allows you to simply connect your wallet and add chains from there (you will need to setup your wallet first.) The details for adding the chain yourself can be found in the Binance Docs.

Obtain Testnet BNB

The BNB Chain testnet’s native token is BNB. We’ll need some contracts to deploy and interact with. To obtain some testnet BNB, go to the Binance Faucet. You must enter your wallet address and then click “Give me BNB.”

Creating the Contract

Head over to the Remix IDE to get started, then in the contracts directory, create a new contract.

Name it BSCCoin.sol

Take a look at this code.

First, we identify the Solidity version we will be utilizing.

From OpenZeppelin, this is the fundamental ERC-20 coin. We include that in our contract. Remember that BEP-20 tokens are quite similar to ERC-20 tokens when establishing one. As a result, we may use the OpenZeppelin ERC-20 contract to create the coin.

For additional information, see their getting started page.

Because we are using OpenZeppelin contracts, our contract may be lot easier. We use the ERC-20 contract that we inherited to produce our BEP-20 coin.

A Word About Decimals
Solidity does not employ decimals. This means that if you want to utilize less than whole integers, you must use fixed-point arithmetic. A set number of decimals must be stored in the value. Decimals() is set to 18 in this example, which implies we are increasing the amount of tokens we mint by 1018.

Utilizing

You now have a fully working BEP-20 token as a result of this contract! It is now time to deploy it to the BNB Chain testnet.

First, set the Environment to “Injected Web3,” which will allow Remix to interface with the blockchain through your wallet.

Next, confirm that you are using the right contract. In this case, it’s “BSCCoin.”

Select the quantity of tokens to produce, then click the “Deploy” button. A confirmation button should appear. We are now deploying to a live blockchain. As a result, there will be a gas cost.

The contract may take some time to completely deploy. Once it is, you will see it under “deployed contracts,” where you will be able to examine all of the contract’s functions. The OpenZeppelin contract was used to import these functions.

We may double-check if the contract is visible on the BNB Chain testnet once it has been deployed.

Make a note of the contract address and go to BNB ChainScan.

Search for it by entering the contract address. The token and contract should be visible.

you’ve just deployed a BEP-20 token to the BNB Chain testnet.

What information is contained in a BNB Chain Wallet address?

You should be aware of three highly significant facts about a BNB Chain Wallet:

When sending assets to the BNB Chain wallet, a string of numbers and characters is known as a wallet address. Through the wallet address you specify, others can send money to you. The following is the format of a BNB Chain (BNB BEP20) wallet address: 0x859AA4525c19829034CbbFD916F46c068F116310

An encryption key that may be used as a password and contains any 12 English words. The Passphrase login step must be completed in order to execute the wallet recovery process. Password formats include: task, estate tube, ear decade, stone trick, army gray, wonderful net bottle.

Quite similar to a bank account password, a private key is a combination of letters and numbers that is used to connect to an account. The structure of a private key is 0x3b0c8dd07372e32a5eb89b2c74996d6daad56cc8a40bc7eaa418b5d5630623b1.

In order to understand, think of the BNB Chain Wallet as a bank account, with the account number being the wallet address and the password representing the passphrase/private key.

The distinction here is that with a bank account, others will have access to your personal information. In the case of the BNB Chain Wallet, the user becomes anonymous; no one knows who owns the wallet, and transactions are only possible via the address, which is encoded into a series of numbers and letters.

You could either proceed to the BNB Chain mainnet from here with your token or you could give it further features. The OpenZeppelin contracts allow for extra minting, burning, voting, and other features. For further information, see the OpenZeppelin documentation.

Many new options await you now that you understand how to manufacture a BEP-20 coin. It might be used to interface with DeFi apps, to develop a governance protocol, or to start a Chainlink Pricing Feed to monitor its price.


Simplifying Defi for Beginners

0

The promise of cryptocurrencies is that they would provide global access to money and payments for everyone, wherever they may be.

The Decentralized Finance (DeFi) or Open Finance movement expands on that promise. Consider a worldwide, open alternative to every financial service you now use — savings, loans, trading, insurance, and more — that is available to anybody in the world with a smartphone and an internet connection.

DeFi is a cryptocurrency industrial sector that focuses on offering decentralized financial services. It is made up of a variety of financial services provided by developers that anybody may use. These services differ from centralized alternatives in that they are managed by groups of people through decentralized organizations and provide consumers more control over their finances.

Every week, new decentralized and non-custodial financial services are launched to the DeFi industry, which is a hub of innovation. These services are available to everyone, wherever in the globe.

Let’s start at the basics…

What is Defi?

So, what exactly is this expanding and flourishing word known as DeFi? Isn’t crypto finance, in general, decentralized? In a way, The Decentralization movement refers to a type of financial product that prioritizes decentralization and employs profitable incentive systems to entice investors to participate.

The decentralized finance industry is made up of a wide range of non-custodial financial products that are based on a culture of highly-experimental, highly-profitable crypto initiatives that have attracted the attention of leading businesses and venture capitalists—as well as quite a few con artists.

Decentralized finance is a simplified definition of DeFi. This is a financial application ecosystem built on blockchain technology. Unlike the traditional financial environment, the DeFi area is devoid of any central authority.

DeFi, on the other hand, uses a peer-to-peer network to create decentralized applications that allow anyone to connect and manage their assets regardless of their location or status. DeFi’s goal is to ensure that individuals from all around the world have access to open-source, transparent, and permissionless financial services.

Smart contracts underpin the decentralized finance ecosystem. Smart contracts are self-executing and do not require the intervention of a third party. DeFi had its beginnings on the Ethereum network. As a result, it is not surprising that the majority of DeFi protocols are based on the Ethereum blockchain.

How does DeFi work?

Aave, Maker, and Compound are three of the most popular projects. These are technologies that let you to borrow cryptocurrency instantly—and frequently in big quantities if you can demonstrate your ability to repay the loan in a single transaction. You may also make money by lending out cryptocurrency.

Then there is Uniswap, a decentralized exchange that enables you to trade any Ethereum-based token you choose or to make money by boosting the market’s liquidity. Synthetic assets, such as the tokenized equities from Synthetix or the decentralized stablecoin DAI from Maker, are another focus of DeFi. These assets’ values are decided algorithmically by the protocol. Other services, for example, non-custodially migrate Bitcoin to Ethereum or provide decentralized price oracles, which, among other things, allow synthetic assets to correctly peg themselves to their non-synthetic counterparts.

With DeFi protocols, you always maintain control over your cryptocurrency. The creators of these protocols vote themselves out of power as soon as possible and let the users vote on the future of the network. Many of these lending protocols offer crazy interest rates, bumped up even higher by the phenomenon of yield farming.

Understanding Debt Consolidation Lending

On the DeFi platform, a borrower can take a loan, allowing the lender to earn interests once the loan is returned. The lending process is executed from the start till the finish without intermediaries. A coin holder sends the tokens they intend to lend into a pool using a smart contract. Afterward, the smart contract issues tokens that are doled out automatically to the lender.

Almost all loans made using native tokens are collateralized. This implies that customers who want to borrow money must give a guarantee. Unlike the centralized banking system, however, the guarantee in the DeFi space is in the form of cryptocurrencies worth more than the loan itself.

On paper, this concept may appear nonsensical because the borrower might potentially sell their assets to create the funds in the first place. DeFi borrowing, on the other hand, makes sense for a variety of reasons.

For starters, the users may want cash to cover unanticipated bills and may not intend to sell their holdings since they feel the assets will improve in value in the future. Furthermore, users can dodge or postpone paying capital gains taxes on their cryptocurrencies by borrowing money using DeFi protocols. Individuals can also utilize the monies borrowed through the DeFi protocols to boost their leverage on certain trading situations.

Buying crypto

Almost all loans provided using native tokens are collateralized. This implies that customers who want to borrow money will have to submit a guarantee. However, unlike the centralized banking system, the guarantee in the DeFi space is in the form of cryptocurrencies that are worth more than the loan itself.

On paper, this concept may appear ludicrous, given the borrower might conceivably sell their assets to create the funds in the first place. However, there are various reasons why DeFi borrowing makes sense.

After buying funds on a centralized exchange, you need to move them to a wallet that supports that network. It’s important to avoid moving funds to the wrong network, so before withdrawing, make sure you are using the correct network. DeFi applications are built on top of networks and each network has its own native tokens. These native tokens are used to pay for transactions on these blockchains.

Lending

DeFi protocols aim to make it simple to lend and borrow cryptocurrency directly from one another. Interest rates are determined by supply and demand and hence fluctuate over time. Most regulations require borrowers to overcollateralize their loans in order to ensure that lenders are reimbursed in the event of market instability.

Assume a user need $1,000 to meet a short-term obligation. They may be compelled to sell their Bitcoin or Ethereum assets if DeFi is not available. They can use DeFi lending services to deposit, for example, $1,500 in BTC into a protocol to obtain a $1,000 loan in a stablecoin. They may satisfy their obligations without losing exposure to BTC, and then simply refund the loan with interest.

The DeFi protocol’s smart contracts will liquidate the coins to repay the loan if the value of their collateral falls to $1,000 due to a decline in the price of Bitcoin. If the price of Bitcoin rises while the loan is being repaid, the action was justifiable because the user did not lose exposure.

What exactly are DeFi services?

To start using a wallet compatible with DeFi protocols, all you need to do is head over to the website of these protocols and connect your wallet to them. The simplest actions would be to either trade using a decentralized exchange (DEX) or lend funds using a lending protocol.

Connecting your wallet is comparable to “logging in” to the service using your account — in this case, your wallet address. There are hundreds of possibilities out there, so instead of individually going over every project, here’s an overview of which products and services are available to use and what you should consider before using them.

How to Begin Using DeFi

If you want to use DeFi, you’ll have to buy the relevant coin for the DeFi protocol you plan to use. Right now, most DeFi protocols live on Ethereum, so you’ll need to buy ETH or an ERC-20 coin to use them.

There are innumerable ways to do so. First, get a wallet that supports Ether and can connect to DeFi through your browser. MetaMask is a common choice.

You could become a “yield farmer” by earning the governance tokens that are awarded for lending out your cryptocurrencies. More information on potential profits from yield farming can be found on sites like yieldfarming.info and yearn.finance, which lists them in one simple place.

A second strategy is to invest in a decentralized exchange, such as Uniswap, and earn fees by becoming a market maker. You may invest in a decentralized exchange like Uniswap and earn fees by becoming a market maker. You may also put them into the contentious SushiSwap, which enables you to earn yield-farming tokens for conducting market trades.

Money, whose token price “rebases” daily, skewing the price of the token, or the popular variety of volatile meme coins.

Third, you may invest in one of the more extreme DeFi projects, such as Based.Money, whose token price “rebases” everyday, skewing the price of the token, or one of the popular volatile meme currencies, such as $YAM, $TENDIES, $KIMCHI, $SHRIMP, and so on.

But bear in mind that the place is fraught with dangers, scams, and mistakes. Fraudsters, exit scammers, and “rug pullers” abound in the cryptocurrency field. People frequently identify flaws in smart contracts that indicate how the token creators have complete control. This is a very experimental and hazardous area of cryptography.

Using DeFi to make your cryptocurrency work for you

While there are multiple goods and services in DeFi, the sector is highly linked and composable, which means that elaborate tactics to boost yields are conceivable, but a fault in one protocol might result in losses in another.

However, the fundamental advantage of adopting DeFi is that there are no trusted third parties. Because most DeFi protocols are operated by decentralized autonomous organizations (DAOs) rather than centralized enterprises, anybody may inspect the code contained in the smart contracts used by these protocols.

Before venturing into space, potential users should be aware of a few services provided by the DeFi ecosystem.


How to Create an NFT

0

A step-by-step manual for producing your own NFT.

Do you wish to learn how to produce and market an NFT? As a feasible way to commercialize their work, many artists are looking into the idea of turning their creations into nonfungible tokens. By creating secure ownership of an original digital asset and giving access to vibrant, new communities of potential buyers, NFTs enable the digital sale of art.

Despite multiple recent incidents of NFT work being misappropriated, misissued, or stolen, as well as exchanges being hacked, non-fungible tokens are still in use and becoming increasingly relevant to artists. NFT collections are now being physically shown in galleries.

In essence, the term “non-fungible” means “unique” or “irreplaceable.” By offering a way to build a digital record on a blockchain to prove ownership of the original file or object, nonfungible tokens, or NFTs, make often readily copied digital items unusual and hence valuable. NFTs are typically associated with digital art, but they may also be used to represent everything from real estate to music to movies.

Read our description of what NFTs are in order to have an understanding of them before learning how to create and sell them. We developed NFT drop rules and explained how to spot a fake NFT in this post.

A Word of Caution on How to Manufacture and Sell an NFT

The high-profile sales of artists such as Beeple, who notably sold his The First 5000 Days NFT for $69 million, have enticed many artists to learn how to manufacture and sell NFTs. Such staggering figures reflect a relatively modest percentage of NFT sales. The majority of NFT art sells for the same prices as other good work would. One significant distinction is that NFTs can allow digital artists to collect royalties on all future sales whenever their NFT is transferred – this can be written into the initial smart contract.

Another thing to keep in mind right away is that there are several expenses associated with creating, maintaining, and selling an NFT. While certain NFT markets now offer fee-free NFT minting, with the expense placed on the buyer, in most situations, the creator must pay for minting the NFT, whether they sell it or not. For more information, see our free NFT lesson.

Despite the fact that the NFT market has experienced a little decline this year, an increasing number of artists, illustrators, and designers are making a living by selling NFTs.

Nonfungible.com estimates that primary and secondary sales on the Ethereum blockchain would exceed $15 billion in 2021, up from $67 million the previous year. So, if it appears to be an option for you, let’s get started with the fundamentals of making and selling NFT. We’ll walk you through the process step by step and go over NFT marketplaces, NFT cryptocurrency, and anything else you need to know.

How to make and sell an NFT

The first step in creating and selling an NFT is to ‘mint’ it (assuming you already have the piece of art you want to transform into an NFT). To create an NFT of your artwork, you’ll need to select an NFT platform and a payment wallet – the latter will be required to pay the fees for the former, as well as to receive any payout if your NFT is successful. We’ll use Rarible as the NFT platform and MetaMask as our payment wallet to demonstrate the process.

Select a digital wallet

You’ll need bitcoin to create and sell an NFT. Most NFT auction sites will charge you a fee to’mint’ an NFT, which is the process of converting your artwork into a non-fungible token that you may sell. Because it is the primary cryptocurrency of the open-source blockchain platform Ethereum, where NFTs first appeared, the cryptocurrency ether (abbreviated as ETH) is the most generally accepted form of payment.

Some platforms are beginning to accept a variety of payment formats and to construct NFTs utilizing various blockchains, some of which are more environmentally friendly.

Make sure your existing ETH is stored in a digital wallet that you can connect to your preferred NFT platform in order to send and receive payments. If you don’t have any cash, there are several cryptocurrency exchanges where you may purchase ETH, but the quickest and easiest way is generally to purchase straight using your preferred digital wallet.

There are several NFT payment systems to select from, including Coinbase, MetaMask, Torus, Portis, WalletConnect, MyEtherWallet, and Fortmatic. We’ll use MetaMask as an example, but you could use any of the platforms listed above, as well as many more. In most circumstances, the procedure is the same. Before making a decision, we recommend thoroughly researching the expenses involved.

If you’d rather use another platform, or if you already have a digital wallet and understand how it works, skip to step 4. Otherwise, we’ll walk you through setting up your wallet and purchasing ETH in the following step.

To pay for your NFT, create a digital wallet

Visit the MetaMask website and choose the blue “Download” button in the top-right corner to generate a digital wallet that will allow you to pay an NFT platform to produce and sell an NFT. The browser extension will be installed since we’re using a desktop computer, but there is also a mobile app available.

You will be prompted to confirm your want to ‘create a new wallet and seed phrase.’ Don’t be too concerned with what a “seed phrase” is (it’s just a list of words that holds blockchain information). Say yes, and then it’s only a question of agreeing to the conditions, establishing a password, and going through basic security checks to have your account set up.

Insert bitcoin into your wallet

After you’ve created your MetaMask wallet, or any digital wallet, you’ll need to fund it with ETH. If you don’t already have some ETH, you’ll need to purchase some now, so click the ‘Buy’ button and choose ‘Buy ETH with Wyre’.

You’ll be brought to a screen where you may buy ETH using Apple Pay or a debit card. You may delay this stage till later if you don’t want to part with any money yet; it simply takes a bit more faff (you’ll want to check your preferred NFT platform’s costs to know how much you’ll need to buy).

The cryptocurrency jargon might make this portion of learning how to produce and sell an NFT seem overwhelming, but purchasing money is actually fairly simple. Just keep in mind that the value of Ether, like bitcoin and many other cryptocurrencies, may vary dramatically.

The price of one ETH has risen from about $1,000 to over $4,700 at the time of writing, with several peaks and valleys along the way. It is very conceivable for the currency’s value to fluctuate by hundreds of dollars in a matter of hours.

Link your wallet to an NFT platform

The majority of digital wallets function similarly. Regardless of the option you select, you must link it to the NFT platform you’ll be using to sell the NFT. We’re using Rarible as an example, but there are many more NFT platforms to pick from, and the procedure will be broadly similar to what we detail below.

Visit Rarible.com (shown above). A ‘Connect wallet’ button is located in the upper right-hand corner of the screen. When you click there, you’ll be asked for your wallet provider, which in our instance is MetaMask. A window will appear, giving you the opportunity to link your wallet to Rarible. Click ‘Next,’ then ‘Connect,’ agree to the terms of service, and confirm you’re above the age of 13.

Upload the file to be converted into an NFT

So, now that you have a wallet linked to ETH for payment, you are ready to create and sell an NFT. Click the blue ‘Create’ button at the upper right of the Rarible website. You will then be offered the choice of creating a single, one-time work or selling the same thing several times.

In this case, we’ll go with ‘Single.’ You must now upload the digital file that you wish to convert to an NFT. Rarible allows up to 30MB PNG, GIF, WEBP, MP4 and MP3 files.

To demonstrate, we made a piece of art that is ironically terrible. Upload your digital asset, and a preview of your NFT post will appear on the right.

Create an auction for your NFT

You must decide how to sell your NFT artwork in the following section of the form. There are three choices. ‘Fixed price’ allows you to select a price and sell your NFT immediately (similar to eBay’s ‘Buy it now’ option). The ‘Unlimited Auction’ option allows individuals to keep bidding until you accept one. Finally, a ‘timed auction’ is an auction that only lasts a certain amount of time. As an example, let’s go with that choice.

This brings us to the most difficult part: deciding on a starting price. If you sell your NFT too cheaply, the massive fees will eat away your profit, perhaps leaving you out of pocket. We’ll set our price at an aggressive 1 ETH (now $4,700) and offer people seven days to bid.

Following that, you have the option to ‘Unlock once bought.’ This allows you to present your eventual customer with a full, high-resolution version of your artwork as well as other content via a secret web page or download link. The option below that, labeled ‘Choose Collection,’ is the most perplexing. This is a highly technical inquiry concerning how the blockchain works. The default setting is ‘Rarible,’ and we recommend leaving it that way.

To sell your NFT, include a description

You may now give your listing a title and a description. Spend some time considering this to increase the likelihood that your NFT will sell. You are then asked to consider what proportion of royalties you want to claim on any future sales of your art.

Again, a greater percentage will net you more money per sale in the long term, but it will also discourage people from reselling your art in the first place since they will be less likely to make a profit for themselves. Finally, there is an optional box where you may enter the characteristics of your file. You’re almost through with it.

To sell your NFT, pay the listing cost

By clicking “Create Item,” you’ll be given the opportunity to connect with your wallet and pay the listing fee, which is the last step in learning how to create and sell an NFT. Don’t worry if you don’t have enough money in your wallet: you won’t have to start again. Simply click on the wallet icon in the top-right corner of the screen, and you’ll be able to add funds from within Rarible.

Before we begin, a final word of caution. The listing charge may appear to be low: in our instance, it came to just $5.91 in US dollars. But this is merely the beginning. Before you can proceed, you must agree to pay an additional cost to construct your NFT, which in our instance would have been the equal of $42.99 in ETH.

If someone buys your NFT, you’ll have to pay a commission charge on the NFT sale as well as a transaction fee for the money to be sent from the buyer’s wallet to your own.

You’re forced to take the chance and wait to see how much you’ll be charged overall if you make a sale, hoping to still earn a profit. If you do decide to take a chance and invest in developing NFT art, we wish you the best of success.


How to Link MetaMask to the Binance Smart Chain

0

A well-liked and widely downloaded wallet for holding digital assets like cryptocurrencies is called MetaMask. You might not be aware that a MetaMask wallet can connect to blockchains other than Ethereum if you’re just getting started with one.

Due to MetaMask’s exceptional adaptability (BSC), the majority of decentralized applications (dapps) and decentralized exchanges (DEXs), including the Binance Smart Chain, are compatible with it. Here is a simple step-by-step guide that will show you how to use MetaMask with the Binance Smart Chain.

But first, do you have an idea of what Metamask and BSC are?

What is MetaMask?

The Ethereum blockchain may be interacted with via the ConsenSys-owned cryptocurrency wallet MetaMask, which is accessible to users as a web browser plugin and a mobile wallet. MetaMask, as a crypto gateway, may connect to blockchains other than Ethereum.

BSC or Binance Smart Chain is

a blockchain platform created with the intention of promoting the development of Decentralized Applications It enables developers to use Smart Contracts to put their ideas on the blockchain.

Now that you know, let’s go for what you came here for.

How to link MetaMask to BSC in steps

Open your MetaMask wallet and sign in.

Go to “Settings” from the account choices (a circle symbol).

Select “Networks” once you’re in settings.

Select the “Add Network” option.

You will be redirected to a new screen. This is the most crucial stage since it is here that you will provide the information needed to connect to the Binance Smart Chain. Enter the following new information and save it:

Network Name: Smart Chain

New RPC URL: https://bsc-dataseed.binance.org/

ChainID: 56

Symbol: BNB

Block Explorer URL: https://bscscan.com

You’ll be returned to the wallet screen after entering that data. The Binance Smart Chain has been added to your MetaMask wallet in two ways. The two red boxes in the screenshot below prove it. In the first box up top, it says “Smart Chain was successfully added,” and in the bottom right, it shows the BNB token standard.

You must first receive your wallet address by clicking on it in order to deposit Binance Coin (BNB) into it. Then you may send BNB to your wallet.

To summarize, MetaMask and BSC have been expanding at breakneck pace in recent years. Users will undoubtedly find it much more straightforward to connect BSC to MetaMask.


Metamask For Beginners

0

A free cryptocurrency wallet called MetaMask can connect to almost any Ethereum-based website.

Cryptocurrency and decentralized applications (dapps) are the cornerstones of Web3, the decentralized internet. However, a user interface is necessary in order to use them. The ideal interface is one that is slick, uncomplicated, and clear.

One of the main entrance points into the realms of Web3, decentralized finance (DeFi), and NFTs is MetaMask, a well-known cryptocurrency wallet that relies on browser integration and appealing design.

What is MetaMask?

As with other browser plugins, MetaMask must be installed before it can be used as an Ethereum wallet. It allows users to store Ether and other ERC-20 tokens once loaded, allowing them to transact with any Ethereum address.

Users may spend their currencies in games, stake tokens in gambling apps, and sell them on decentralized exchanges by linking MetaMask to Ethereum-based dapps (DEXs). Additionally, it gives users a method to access DeFi apps like Compound and PoolTogether, giving them a gateway into the developing realm of decentralized finance, or DeFi.

Before you can create your first non-fungible token (NFT), lend assets on a decentralized finance (DeFi) system, or just acquire and trade Ethereum-based tokens, you’ll need to obtain appropriate crypto-wallet software. This enables you to store whatever assets you earn or buy, as well as connect to any platform built on the Ethereum blockchain.

Despite the existence of competing wallet services, MetaMask is by far the most well-liked, with over 21 million active users per month, a 38x growth since 2020. MetaMask is a free hot wallet service that may be used using a smartphone app or a web browser plugin.

It may be then downloaded directly to your phone or the Google Chrome, Mozilla Firefox, Brave, or Edge browser, similar to an ad blocker plugin. The “hot” part simply means that it is constantly connected to the internet, allowing you to rapidly transfer your crypto assets at any time.

MetaMask’s interoperability with virtually all Ethereum-based apps is one of the key reasons it is so popular among both new and seasoned cryptocurrency users. Users may access over 3,700 different decentralized applications and Web 3 services with MetaMask.

So, how do you go about creating your own MetaMask crypto wallet?

Installation

To get started, go on the official website and download the MetaMask wallet app to your favorite device. You will be presented with the following options:

  • Browsers: Google Chrome, Firefox, Brave, and Edge are all supported.
  • Android: Compatible with any smartphone running the Android operating system.
  • iOS: Compatible with any iPhone.

After you’ve made your selection, click the “Install MetaMask for…” button.

Once the program has been properly downloaded, navigate to the extension icon in the top right corner of your web browser and look for the MetaMask option. When you click the “Get Started” button, you’ll be sent to the next page with two options:

Import wallet: This option is available to users who already have a MetaMask wallet on another device and wish to move it to a new one.

Create a wallet: Select this option if you want to create a new MetaMask wallet.

Select “Create a Wallet,” agree to the brief disclaimer that appears, and provide a password if prompted. As with any password, it is vital to physically write many copies of the password down on separate pieces of paper. You should never make a digital copy of any password you create, including screenshotting it, emailing it to yourself, or saving it as a note on your computer. Don’t make it easy for hackers to access anything digitally on your computer.

Your password must be entered each time you wish to access your MetaMask wallet.

Sometimes we ‘accidentally’ forget the password as time passes. But don’t you worry, it happens to all of us. That’s why Metamask has a Secret Recovery Phrase.

Secret recovery phrase

The following screen will describe secret recovery phrases, how to write them down (on paper, not digitally), and why you should never share your secret recovery phrases with anyone.

Basically, your secret recovery phrase consists of 12 unrelated words. It serves as a backup in case you misplace the phone or laptop from which you downloaded your MetaMask wallet and need to import it to a new device.

Each word must be carefully written down in the exact sequence as it appears on the screen. Even if you input all 12 words properly, you will not be able to import your account to a new device if the words are not in the correct order.

Before moving on to the next steps, MetaMask will ask you to fill out a 12-word sequence.

An overview of the MetaMask wallet

After completing the above steps, you will have access to your new MetaMask wallet. Before you can use the program, you must first become acquainted with two essential components:

Identifying your public address: This is the address that you may freely share with other people or platforms like exchanges in order for them to receive bitcoin into your wallet. Consider it your home address, which you give to others so that you can receive incoming mail. However, before accepting any inbound tokens, double-check that they are compatible with MetaMask; otherwise, they may be lost permanently.

How to fund/buy and sell: These are MetaMask’s primary functions.

The “Account 1” option will allow you to access your own MetaMask public address (black arrow). Click the stacked square symbol underneath it to automatically duplicate it so you don’t have to input it every time you need to use it.

As a last step, you must add ether, Ethereum’s native token, to your MetaMask wallet before you may interact with any Ethereum network. Every transaction on the blockchain incurs a fee, whether it’s moving tokens from A to B or creating an NFT collection. Because it is charged in ether, this is referred to as a “gas” fee.

How much involvement you wish to have with different networks affects how much money you decide to put into your wallet. For moderate use, $100 in ether is usually enough to cover any early costs.

The “buy” button (red arrow) will take you to a window where you can use Wyre or CoinSwitch to purchase ether. These services will allow you to buy ether using a debit card or trade it for other crypto tokens.

You may now transmit crypto assets from your MetaMask to other wallets after acquiring a quantity of ether by entering the recipient’s public address and selecting the amount, including the gas cost, in the box given.

Additionally, you may exchange ether for a range of different Ethereum-based tokens within the app using the “Swap” feature, or you can start using third-party services like NFT markets or DeFi platforms.

In the top right corner of the screen, most platforms include a “connect” button. You’ll be able to link your MetaMask wallet after clicking it. You may be requested to sign a transaction to finish the connecting procedure. This does not cost you anything; it simply shows that you have control over your finances.

Always remember: Never share your password with anyone. EVER.