A free cryptocurrency wallet called MetaMask can connect to almost any Ethereum-based website.
Cryptocurrency and decentralized applications (dapps) are the cornerstones of Web3, the decentralized internet. However, a user interface is necessary in order to use them. The ideal interface is one that is slick, uncomplicated, and clear.
One of the main entrance points into the realms of Web3, decentralized finance (DeFi), and NFTs is MetaMask, a well-known cryptocurrency wallet that relies on browser integration and appealing design.
What is MetaMask?
As with other browser plugins, MetaMask must be installed before it can be used as an Ethereum wallet. It allows users to store Ether and other ERC-20 tokens once loaded, allowing them to transact with any Ethereum address.
Users may spend their currencies in games, stake tokens in gambling apps, and sell them on decentralized exchanges by linking MetaMask to Ethereum-based dapps (DEXs). Additionally, it gives users a method to access DeFi apps like Compound and PoolTogether, giving them a gateway into the developing realm of decentralized finance, or DeFi.
Before you can create your first non-fungible token (NFT), lend assets on a decentralized finance (DeFi) system, or just acquire and trade Ethereum-based tokens, you’ll need to obtain appropriate crypto-wallet software. This enables you to store whatever assets you earn or buy, as well as connect to any platform built on the Ethereum blockchain.
Despite the existence of competing wallet services, MetaMask is by far the most well-liked, with over 21 million active users per month, a 38x growth since 2020. MetaMask is a free hot wallet service that may be used using a smartphone app or a web browser plugin.
It may be then downloaded directly to your phone or the Google Chrome, Mozilla Firefox, Brave, or Edge browser, similar to an ad blocker plugin. The “hot” part simply means that it is constantly connected to the internet, allowing you to rapidly transfer your crypto assets at any time.
MetaMask’s interoperability with virtually all Ethereum-based apps is one of the key reasons it is so popular among both new and seasoned cryptocurrency users. Users may access over 3,700 different decentralized applications and Web 3 services with MetaMask.
So, how do you go about creating your own MetaMask crypto wallet?
Installation
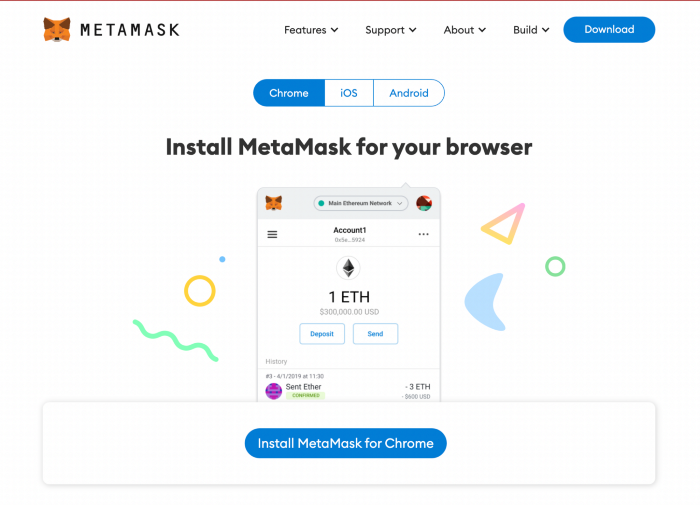
To get started, go on the official website and download the MetaMask wallet app to your favorite device. You will be presented with the following options:
- Browsers: Google Chrome, Firefox, Brave, and Edge are all supported.
- Android: Compatible with any smartphone running the Android operating system.
- iOS: Compatible with any iPhone.
After you’ve made your selection, click the “Install MetaMask for…” button.
Once the program has been properly downloaded, navigate to the extension icon in the top right corner of your web browser and look for the MetaMask option. When you click the “Get Started” button, you’ll be sent to the next page with two options:
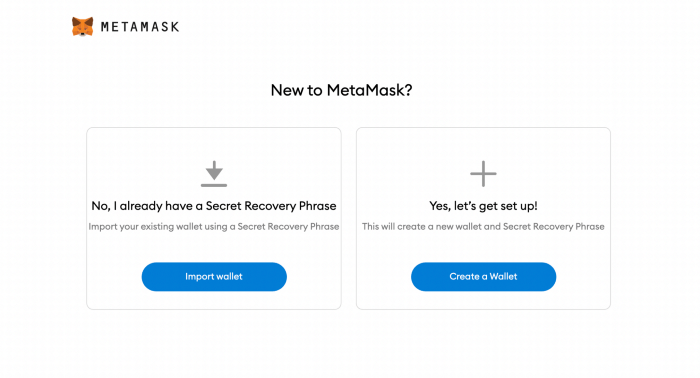
• Import wallet: This option is available to users who already have a MetaMask wallet on another device and wish to move it to a new one.
• Create a wallet: Select this option if you want to create a new MetaMask wallet.
Select “Create a Wallet,” agree to the brief disclaimer that appears, and provide a password if prompted. As with any password, it is vital to physically write many copies of the password down on separate pieces of paper. You should never make a digital copy of any password you create, including screenshotting it, emailing it to yourself, or saving it as a note on your computer. Don’t make it easy for hackers to access anything digitally on your computer.
Your password must be entered each time you wish to access your MetaMask wallet.
Sometimes we ‘accidentally’ forget the password as time passes. But don’t you worry, it happens to all of us. That’s why Metamask has a Secret Recovery Phrase.
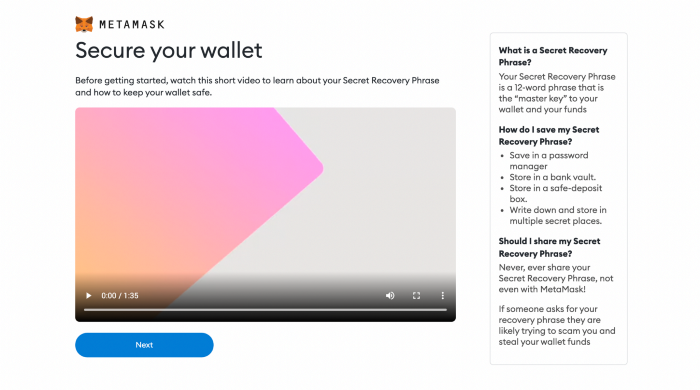
Secret recovery phrase
The following screen will describe secret recovery phrases, how to write them down (on paper, not digitally), and why you should never share your secret recovery phrases with anyone.
Basically, your secret recovery phrase consists of 12 unrelated words. It serves as a backup in case you misplace the phone or laptop from which you downloaded your MetaMask wallet and need to import it to a new device.
Each word must be carefully written down in the exact sequence as it appears on the screen. Even if you input all 12 words properly, you will not be able to import your account to a new device if the words are not in the correct order.
Before moving on to the next steps, MetaMask will ask you to fill out a 12-word sequence.
An overview of the MetaMask wallet
After completing the above steps, you will have access to your new MetaMask wallet. Before you can use the program, you must first become acquainted with two essential components:
Identifying your public address: This is the address that you may freely share with other people or platforms like exchanges in order for them to receive bitcoin into your wallet. Consider it your home address, which you give to others so that you can receive incoming mail. However, before accepting any inbound tokens, double-check that they are compatible with MetaMask; otherwise, they may be lost permanently.
How to fund/buy and sell: These are MetaMask’s primary functions.

The “Account 1” option will allow you to access your own MetaMask public address (black arrow). Click the stacked square symbol underneath it to automatically duplicate it so you don’t have to input it every time you need to use it.
As a last step, you must add ether, Ethereum’s native token, to your MetaMask wallet before you may interact with any Ethereum network. Every transaction on the blockchain incurs a fee, whether it’s moving tokens from A to B or creating an NFT collection. Because it is charged in ether, this is referred to as a “gas” fee.
How much involvement you wish to have with different networks affects how much money you decide to put into your wallet. For moderate use, $100 in ether is usually enough to cover any early costs.
The “buy” button (red arrow) will take you to a window where you can use Wyre or CoinSwitch to purchase ether. These services will allow you to buy ether using a debit card or trade it for other crypto tokens.
You may now transmit crypto assets from your MetaMask to other wallets after acquiring a quantity of ether by entering the recipient’s public address and selecting the amount, including the gas cost, in the box given.
Additionally, you may exchange ether for a range of different Ethereum-based tokens within the app using the “Swap” feature, or you can start using third-party services like NFT markets or DeFi platforms.
In the top right corner of the screen, most platforms include a “connect” button. You’ll be able to link your MetaMask wallet after clicking it. You may be requested to sign a transaction to finish the connecting procedure. This does not cost you anything; it simply shows that you have control over your finances.
Always remember: Never share your password with anyone. EVER.


